HTTP, HTTPS 방화벽 오픈
$ sudo firewall-cmd --add-service=http
$ sudo firewall-cmd --add-service=https
$ sudo firewall-cmd --runtime-to-permanent

저는 이미 열려있다고 하네요.
인증서를 저장할 폴더를 만들고 일반사용자가 접근을 못하게 권한을 설정해줍시다.
$ sudo mkdir /etc/ssl/private
$ sudo chmod 700 /etc/ssl/private

자 이제 인증서와 키를 생성해봅시다.
$ sudo openssl req -x509 -nodes -days 365 -newkey rsa:2048 -keyout /etc/ssl/private/nginx-selfsigned.key -out /etc/ssl/certs/nginx-selfsigned.crt

Country Name 을 가져오라네요.
이 글을 보시는분은 한국인일거라 생각합니다.
Country Name : KR
State or Province Name : Seoul
Locality Name : SungDong-gu
Organization Name : 회사명
Organization Unit : 부서명
Common Name : 서버의 도메인
도메인을 등록하지 않은 분들은 도메인을 지정해줍시다.

기본값은 localhost.localdomain 가 들어가있군요.
$ sudo vi /etc/hostname 을 수정합시다.

수정해준 뒤 확인해보니 Static hostname 이 바뀐걸 확인할 수 있군요.
변경사항을 시스템에 저장하기 위해 hostname 서비스 데몬을 재시작 해줍시다.
$ sudo systemctl restart systemd-hostnamed

입력을 완료해주면 됩니다.
민감정보는 가려줬습니다 :)
Diffie-Hellman group 을 생성해줍니다.
해당 pem 파일로 Nginx 에서 https 설정을 잡아줄겁니다.
$ sudo openssl dhparam -out /etc/ssl/certs/dhparam.pem 2048

주르륵 주르륵 가더니 완료.
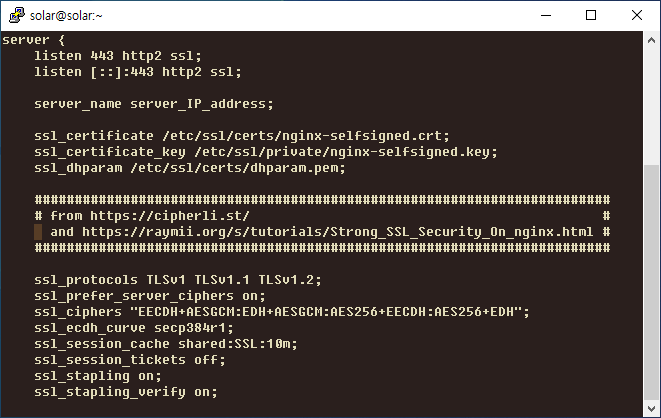
이제 Nginx ssl conf 파일을 작성해봅시다.
$ sudo vi /etc/nginx/conf.d/ssl.conf
server {
listen 443 http2 ssl;
listen [::]:443 http2 ssl;
server_name server_IP_address;
ssl_certificate /etc/ssl/certs/nginx-selfsigned.crt;
ssl_certificate_key /etc/ssl/private/nginx-selfsigned.key;
ssl_dhparam /etc/ssl/certs/dhparam.pem;
########################################################################
# from https://cipherli.st/ #
# and https://raymii.org/s/tutorials/Strong_SSL_Security_On_nginx.html #
########################################################################
ssl_protocols TLSv1 TLSv1.1 TLSv1.2;
ssl_prefer_server_ciphers on;
ssl_ciphers "EECDH+AESGCM:EDH+AESGCM:AES256+EECDH:AES256+EDH";
ssl_ecdh_curve secp384r1;
ssl_session_cache shared:SSL:10m;
ssl_session_tickets off;
ssl_stapling on;
ssl_stapling_verify on;
resolver 8.8.8.8 8.8.4.4 valid=300s;
resolver_timeout 5s;
# Disable preloading HSTS for now. You can use the commented out header line that includes
# the "preload" directive if you understand the implications.
#add_header Strict-Transport-Security "max-age=63072000; includeSubdomains; preload";
add_header Strict-Transport-Security "max-age=63072000; includeSubdomains";
add_header X-Frame-Options DENY;
add_header X-Content-Type-Options nosniff;
##################################
# END https://cipherli.st/ BLOCK #
##################################
root /usr/share/nginx/html;
location / {
}
error_page 404 /404.html;
location = /404.html {
}
error_page 500 502 503 504 /50x.html;
location = /50x.html {
}
}

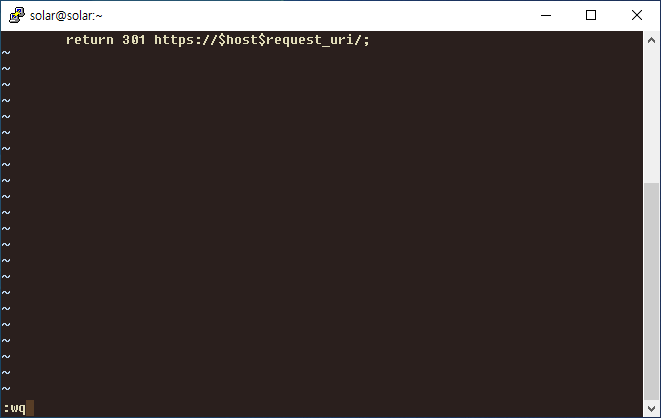
http 연결을 https 로 redirect 하는 설정을 만듭시다.
$ sudo vi /etc/nginx/default.d/ssl-redirect.conf
return 301 https://$host$request_uri/;

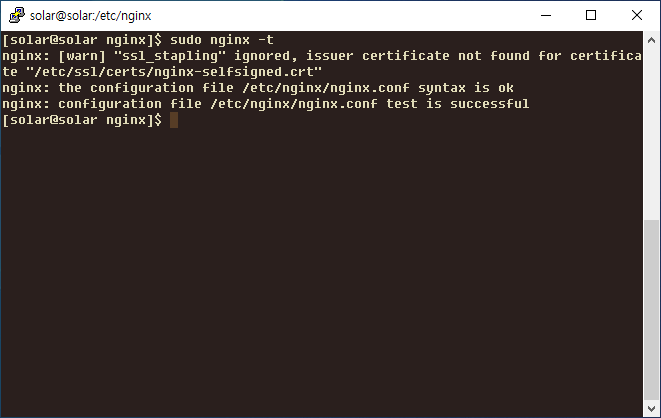
이제 Nginx 가 제대로 ssl 설정으로 실행되는지 확인해봅시다.
$ sudo nginx -t

CA의 인증을 받은게 아닌 사설 인증서라 warning 이 있네요.
상관없이 nginx 를 재시작해줍니다.
$ sudo systemctl restart nginx

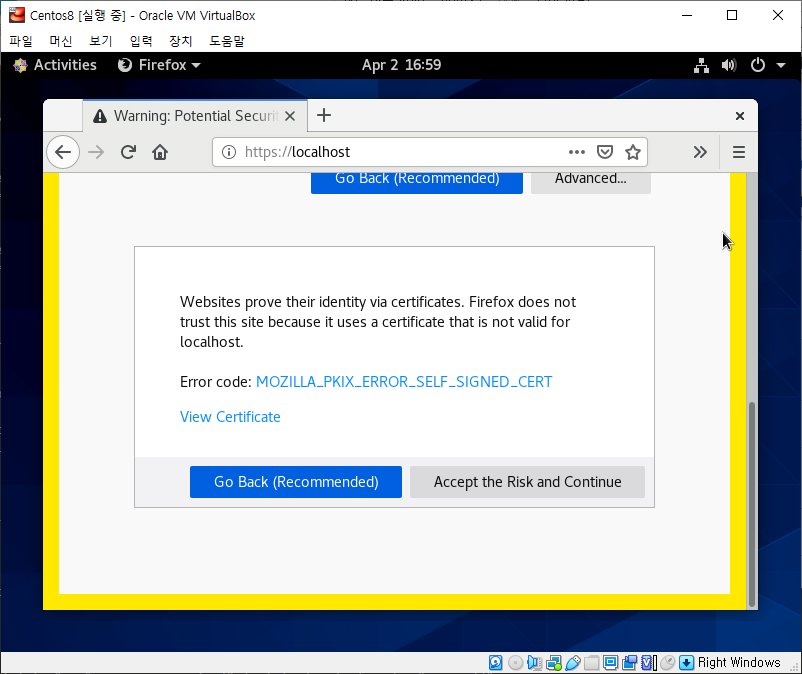
이제 https 로 접속해봅시다.

위험한 페이지라고 경고를 주지만.
Advanced 로 들어가서

리스크를 무시하고 가봅시다.

잘열리는군요 :)
Virtualbox 를 사용중이시라면 443 포트도 열어줘야 외부에서 접근이 가능합니다.


'Linux > nginx' 카테고리의 다른 글
| CentOS 8 Docker 로 Nginx 설치하기 (0) | 2020.04.14 |
|---|---|
| CentOS 8 Nginx Load Balancing 설정 (0) | 2020.04.07 |
| CentOS 8 Nginx Flask 연동 (GET, POST) (0) | 2020.03.24 |
| CentOS 8 Nginx Reverse Proxy Config (0) | 2020.03.24 |
| CentOS 8 Nginx 설치 (0) | 2020.03.17 |


최근댓글